Showing posts with label February 2013. Show all posts

Wednesday, February 27, 2013

Vietnamese-Style Grilled Chicken


from  San Francisco: Authentic Recipes Celebrating the Foods of the World 

INGREDIENTS:
  • 6 cloves of garlic, sliced
  • 1 large shallot, coarsely chopped
  • 1 tablespoon, peeled and minced fresh ginger
  • 4 teaspoons sugar
  • 1/4 cup soy sauce
  • 1/4 cup fish sauce
  • 1/2 teaspoon five-spice powder
  • Freshly ground black pepper
  • 1 chicken (about 3 lbs) cut into eight servings
 
METHOD:
  1. In a mortar and pestle or small food processor combine the ginger, shallot, garlic and sugar and smash to form a paste.
  2. Create a marinade by transferring the paste to a small bowl and whisking in the soy sauce, fish sauce, five-spice powder and a healthy dose of pepper.
  3. Rinse the chicken pieces in cold water and pat dry.  Place the chicken in a large, resealable zip-top bag and pour in the marinade.  Toss the chicken inside the bag to cover evenly with the marinade and refrigerate for 12 hours or as long as overnight.
  4. Prepare a charcoal or gas grill for direct grilling over medium heat.  Remove the chickens from the bag and reserve the marinade in a small bowl.
  5. Place the chicken pieces skin side down on the grill directly over the heat until the first side is nicely browned, about 11-12 minutes.  Baste once or twice with the reserved marinade during the first stage of grilling.  Turn, baste again and grill until the chicken reaches the internal temperature of 165°, about11-12 minutes longer.  Do not baste chicken during the final 10 minutes.
  6. Remove the chicken from the grill and let rest for at least 5 minutes before serving.

NOTES: from Michael Parlapiano

It may not be in my best interest to admit this, but here goes nothing: grilling chicken scares me. It’s just too easy to get wrong. Black, cremated skin on the outside with an interior so pink that just looking at it might give you salmonella. Or worse, well-cooked flesh with skin so flabby that it can be removed in a single piece. I think this is why I am especially in awe of Vietnamese chefs.  I’m not exactly sure how they do it, but somehow they’re able to keep their grilled chicken juicy and moist  inside, but with a crisp exterior reminiscent of deep-fried chicken skin.  While I’ve yet to master this elusive technique, with this fairly simple preparation the delicious results were worth the potential for failure. 

A great alternative to the standard barbecue chicken, this recipe relies on the exotic flavor of Chinese five-spice powder.  Usually a mix of star anise, fennel, cinnamon, cloves and Szechwan peppercorns, the blend lends a sweet and subtly spicy flavor to the dish along with an especially heady aroma.  While its great fresh off the grill, this stuff is just as addictive cold from the fridge or at room temperature for a picnic.

Tuesday, February 26, 2013

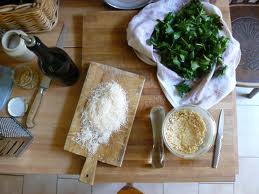
Basil Pesto Blanched


INGREDIENTS:
  • 2 cups washed basil leaves
  • 3 tablespoons toasted pine nuts
  • ½ cup olive oil
  • 1 large bowl of ice water for blanching
  • 1 tablespoon lemon juice
  • ½ teaspoon salt
  • 1 clove garlic
  • ½ cup grated Romano cheese

METHOD:
  1. Bring water to a rolling boil in a pot large enough to fit a colander
  2. Pinch the leaves of basil off the stems, rinse, and put into colander.
  3. Toast the pine nuts.
  4. Fill a big bowl with ice water.
  5. Blanch basil for 10 seconds. Stir constantly to make sure all the basil gets evenly blanched.
  6. Immediately dip basil into the ice water. Stir to cool the basil quickly.
  7. Blend the blanched basil, olive oil, lemon juice, salt, toasted pine nuts, and garlic into a in a food processor until smooth.
  8. If you are going to freeze the sauce, put this mixture into a jar, cover with a layer of olive oil, add a lid and freeze. You can add the cheese later when you heat it up.
  9. Add the cheese to the sauce and mix together before serving.

Parsley Pesto


INGREDIENTS:
  • 1/2 cup chopped walnuts, about 3 1/2 ounces
  • 1 cups chopped Italian parsley, about 1 bunch
  • 1/4 cup grated Pecorino or Parmesan cheese
  • 2 garlic cloves, roughly chopped
  • 1/2 teaspoon salt
  • 1/4 cup olive oil

METHOD:

  1. Put the walnuts, parsley, cheese, garlic, and salt in a food processor and pulse for a few seconds to combine. Scrape down the sides of the bowl, then pulse again. Drizzle in the olive oil while the machine is running just long enough to incorporate the oil, about 20-30 seconds.
  2. Use immediately or cover with plastic wrap and refrigerate to store. Will last several days chilled.
NOTES:
You can easily make fresh pesto in the fall or winter using parsley and walnuts instead of basil or pine nuts. It’s just as green, garlicky, cheesy, and nutty. And great on pasta, with beef, or as a sandwich spread.

    Cilantro Pesto


    Classic

    INGREDIENTS:
    • 1 cup, packed, of cilantro, large stems removed
    • 1/4 cup toasted pine nuts
    • 2 cloves garlic toasted
    • 2 tablespoons Romano cheese
    • 1 teaspoon Kosher salt
    • 3 tablespoons cup olive oil

    Southwest 

     INGREDIENTS:
    • 2 cups, packed, of cilantro, large stems removed
    • 1/2 cup blanched almonds
    • 1/4 cup chopped red onion
    • 1/2 teaspoon chopped and seeded Serrano chile
    • 1 teaspoon Kosher salt
    • 1/4 cup olive oil

    METHOD:
    1. In a food processor, pulse the first three ingredients and salt until well blended. 
    2. With the food processor running, slowly add the olive oil in a steady stream.
    3. Add more oil as needed for your use.
    4. Whatever you don't use, you can freeze. Line a ice cube tray with plastic wrap and fill in the individual cube spaces with the pesto. Freeze and remove from the ice tray, put in a sealed freezer bag for future use.

    NOTES:
    You can add more Serrano chiles to the Southwest Pesto. A full teaspoon will give you a nice, warm pesto.

        Friday, February 22, 2013

        Virtuous Cookies


        INGREDIENTS:
        • 1 egg, well beaten
        • 4 T water
        • 1 teaspoon vanilla
        • 1/2 cup honey
        • 3/4 cup butter
        • 3/4 cup brown sugar
        • 1 cup white flour
        • 3/4 cup whole wheat
        • 1 teaspoon salt
        • 1 teaspoon cinnamon
        • 1/2 teaspoons baking soda
        • 4 cups rolled oats
        • 1/2 cup chopped pecans
        • 1/2 cup dried fruit
        • 1/4 cup candied ginger

        METHOD:
        1. Combine eggs, raisins and vanilla and let stand.
        2. Cream together butter and sugars.
        3. Blend in egg-raisin mixture, oatmeal, and chopped nuts.
        4. Dough will be stiff.
        5. Drop by heaping teaspoons onto ungreased cookie sheet, or roll into balls and flatten slightly.
        6. Bake at 350 degrees for 10 to 12 minutes or until lightly browned.

        Thursday, February 21, 2013

        Oatmeal Ginger Cookies


        INGREDIENTS:
        • 1 1/2 cups (7.5 ounces) all-purpose flour
        • 1 1/2 teaspoons kosher salt
        • 1 teaspoon baking soda
        • 3/8 teaspoon cinnamon
        • 1/2 teaspoon ginger
        • 2 large (3.5 ounces) eggs
        • 1 teaspoon vanilla
        • 3 1/8 cup (9.5 ounces) old-fashioned rolled oats
        • 3/4 cup diced crystallized ginger
        • 1 cup (8 ounces) unsalted butter
        • 7/8 cup (7.5 ounces) firmly packed brown sugar
        • 1/2 cup (2.55 ounces) white sugar

        METHOD:
        1. Position rack in the middle of the oven and preheat the oven to 350F. Line the cookie sheets with baking parchment or a silpat.
        2. In a bowl, combine the flour, salt, baking soda, cinnamon, and ground ginger and whisk together. In another bowl whisk together the eggs and vanilla. In a third bowl, mix the oats and crystallized ginger.
        3. Using an electric mixer, combine the butter and sugars and cream together with a paddle attachment until light and fluffy. Scrape the sides and bottom of the bowl frequently. Gradually add egg mixture until everything is completely combined.
        4. With the mixer on low speed, add the flour mixture in stages. Mix only until everything is just combined, continuously scraping the bottom and sides of the bowl. Then, add the oats and ginger and mix again on low speed until everything is evenly distributed.
        5. Using a medium sized ice-cream scoop, scoop out twelve cookies per tray. Press down the tops of the cookies slightly to flatten them before baking. Bake the cookies for about 12 minutes, rotating the cookie sheet haflway through the baking process. They should be golden brown and baked all the way through. They should be soft, but be careful not to underbake them or they will be doughy and fall apart easily.
        6. Cool the cookies on the sheet for 5 minutes, then move them to a rack to cool completely before storing.
        7. makes: 2 dozen cookies

        Wednesday, February 20, 2013

        Herbs de Provence


        INGREDIENTS:
        • 2 Tablespoons Savory
        • 2 Tablespoons Rosemary
        • 2 Tablespoons Thyme
        • 2 Tablespoons Oregano
        • 2 Tablespoons Basil
        • 2 Tablespoons Marjoram
        • 2 Tablespoons Fennel seed

        METHOD:
        1. In a small mixing bowl, combine all the ingredients together. 
        2. Store in an air-tight container.

        Pickled Carrots and Radishes


        INGREDIENTS:
        • 6 Carrots - 1/4" bias slices
        • 6 Radishes - stemmed and quartered
        • 2 Anaheim chilies - stemmed, seeded, thin slices
        • 1 Jalapeno chile - same thing
        • 1/2 Cups Water
        • 1/2 Cups White vinegar
        • 1 1/2 teaspoon Salt
        • 1 1/2 teaspoon Honey
        • 1/2 teaspoon Mexican oregano
        • 1/2 teaspoon Coriander seeds
        • 1/2 teaspoon Pepper
        • 1/4 teaspoon Marjoram
        • 1/4 teaspoon Thyme
        • 1 teaspoon Bay leaf

        METHOD:
        1. Combine vegetables and peppers.
        2. Combine remaining ingredients in saucepan.
        3. Bring to a boil, simmer 5 minutes.
        4. Pour over vegetables, let cool, cover and refrigerate

        NOTES:
        • Instead of radishes try 6 cloves of garlic and 6 pearl onions.

        Thursday, February 14, 2013

        Pasta with peas, Parmesan & Tarragon


          INGREDIENTS:
          • 12 giant pasta shells
          • 2 cupfuls of frozen peas
          • Parmesan (or vegetarian alternative), grated to make 2tbsp, plus a few shavings
          • a small bunch of tarragon, chopped
          • 4 tbsp fat free Greek yogurt

          METHODS:
            1. Cook the pasta following the packet instructions, adding the peas for the final few minutes.
            2. Drain, leaving 2 tbsp water in with the pasta and toss with the rest of the ingredients. 
            3. Season. Serve with Parmesan shavings while the sauce is hot. 
            4. If you leave the pasta to sit, it will soak up the sauce

            Tarragon Vinegar


            INGREDIENTS:
            • 3 lemons
            • 9 sprigs fresh tarragon
            • 3 teaspoons peppercorn (black, green or pink)
            • 3 teaspoons mustard seeds
            • 3 teaspoons salt
            • 48 ounces white wine vinegar

            METHOD:
            1. Wash 3 glass bottles with hot soapy water, rinse well and set aside to dry.
            2. Using a vegetable peeler, peel a long strip of rind off each lemon, slice in half lengthwise.
            3. Place both lemon strips plus 3 sprigs of tarragon, 1 teaspoon peppercorns, 1 teaspoon mustard seeds and 1 teaspoon salt in each bottle.
            4. Heat vinegar in a sauce pan to a simmer. 
            5. Place funnel in the bottle opening and carefully pour vinegar into each bottle, leaving about 1 to 2 inches at the top.
            6. Seal, shake to mix well and store in a cool dark place for 1 week before enjoying.

            NOTES:
            • Makes 3 (16-ounce) bottles.  
            • The bright flavors of this vinegar make it perfect for adding a boost to dressings, marinades and sauces of all kinds. 
            • Package vinegar for gift giving.

            Wednesday, February 13, 2013

            Spiced Brown Sugar Carrot Bread


            from Beth Hensperger, Food & Wine Magazine

            INGREDIENTS:
            • 3 cups unbleached all-purpose flour
            • 2 teaspoons cinnamon
            • 1 1/2 teaspoons baking powder
            • 1 1/2 teaspoons baking soda
            • 1 teaspoon crushed ground cardamom
            • 1/2 teaspoon salt
            • 4 large eggs
            • 1 1/2 cups packed light brown sugar
            • 1/2 cup granulated sugar
            • 1 cup canola oil
            • 1 teaspoon pure vanilla extract
            • 1 teaspoon grated fresh ginger
            • Grated zest of 1 orange
            • 2 1/2 cups shredded carrots (about 14 ounces)

            METHOD:
            1. Preheat the oven to 350°. Coat two 8-by-4-inch loaf pans with cooking spray or grease and lightly flour the pans.
            2. In a medium bowl, combine the flour, cinnamon, baking powder, baking soda, cardamom and salt.
            3. In a large bowl, beat the eggs with the light brown sugar and granulated sugar until smooth. Add the oil in a thin stream, beating at high speed until the batter has doubled in volume, about 2 minutes. Beat in the vanilla, orange zest and ginger. Fold in the shredded carrots. Beat in the dry ingredients at low speed in 3 batches, mixing well between additions.
            4. Pour the batter into the prepared pans, filling them two-thirds full. Bake in the middle of the oven for 50 minutes to 1 hour, or until a cake tester inserted into the center of the loaves comes out clean. Let the loaves cool in the pans for 10 minutes before turning them out onto a rack to cool completely.
            Makes 2 8-by-4-inch loaves

            Pappardelle with Lamb Ragù


            from Chef Andrew Carmellini of Locanda Verde in New York

            INGREDIENTS:
            • 2 pounds boneless lamb shoulder, cut into 2-inch cubes or 3 pounds bone-in lamb stew meat
            • 2 teaspoons ground coriander
            • 1 teaspoon ground fennel seeds
            • 1/2 teaspoon ground cumin
            • Kosher salt
            • 1/4 cup olive oil
            • 1 carrot, finely diced
            • 1 rib of celery, finely diced
            • 1 onion, finely diced
            • 1 tablespoon tomato paste
            • 1/2 cup dry red wine
            • 2 branches of fresh rosemary
            • 5 sprigs fresh thyme
            • 1 bay leaf
            • 1 28-ounce can diced tomatoes
            • 2 cups chicken stock
            • 3/4 pound pappardelle
            • 3/4 cup fresh whole-milk ricotta cheese
            • 1/4 cup chopped mint

             METHOD:
            1. Preheat the oven to 300°. In a small bowl, combine the coriander, fennel and cumin to create a fragrant spice rub. Lighly season the lamb on both sides with Kosher salt and sprinkle the meat evenly with the spice rub.
            2. Heat olive oil in a large dutch oven over moderately-high heat. In batches sear the lamb on all sides until richly browned, about 10 minutes per batch. Remove the browned meat to a plate and repeat with the remaining lamb.
            3. Add the carrot, onion and celery to the reserved oil/fat in the pan and sauté the vegetables until just beginning to brown, about 7-8 minutes. Stir often to prevent scorching. Push the vegetables to the side of the pot to create a hot-spot in the center. Add the tomato paste and stir constantly until it becomes a few shades darker and releases its bright red oils, about 3 minutes. Stir to combine the tomato paste and vegetables.
            4. Add the wine to deglaze the pot, scraping up any browned bits with a wooden spoon. Allow the wine to reduce until almost completely evaporated before adding in the tomatoes, stock, rosemary, thyme and bay leaf. Return the browned lamb to the pot along with any accumulated juices. Bring the pot to a boil and then reduce the heat to a simmer. Cover tightly and place the pot in the oven. Braise the lamb for 3 hours, checking periodically to make sure that the liquid is not reducing too quickly. Replinish the pot with additional stock or water if the lamb looks like it is getting too dry.
            5. Remove the pot from the oven and allow the sauce to cool slightly before skimming off any accumulated fat. Now is the time to remove any bones. Season the sauce to taste with Kosher salt. The ragù can be refrigerated overnight at this point.
            6. Meanwhile, in a large pot of boiling, salted water, cook the pasta until al dente. Drain well and add the pasta to the sauce. Toss gently to dress the pasta with the ragù, breaking up any large chunks of lamb into smaller, bite-size pieces. Serve the pasta in bowls and top with ricotta cheese and chopped mint.

            NOTES:

            The secret behind an intense, flavor-packed ragù like this one comes from the methodical layering of flavor. Take your time while searing the lamb, making sure to achieve a rich brown color on all sides before moving on to the next batch. I personally like to use bone-in stew meat for this sauce because the marrow and extra connective tissue contribute another dimension of lamby-richness to the final sauce — just be sure to remove any bones prior to dressing the pappardelle. Whatever you do, do not overcrowd the pan. You want the lamb to have the opportunity to fry in the olive oil, not poach in its own juices. I like to tie the thyme, rosemary and bay leaf together with a bit of kitchen twine for easy removal at the end of braising. When sautéing the vegetables, be sure to drive away as much moisture as possible before caramelizing the tomato paste and deglazing with the wine. This step ensures a deeper tomato flavor and helps promote the development of a rich fond. Finally, as with all pasta, be sure to boil the pappardelle in an abundance of well-salted water.

            NOTES: from Michael Parlapiano

            This recipe is an adaptation of one I’ve made in the past which calls for the use of ground lamb and a quick simmer, I opt to slow-braise chunks of lamb shoulder or stew meat over a few hours for a more rustic finished sauce. Either way you decide to go, you’ll find that the combination of the savory lamb ragù, creamy ricotta cheese and herbaceous mint is a truly spectacular one. It’s definitely worth your time to seek out pappardelle if you can find it at your local grocery store or Italian deli. The long, ribbon-like noodles are quite sturdy when cooked properly and provide the perfect companion for thick, meat-laden sauces like this one. If you’re a fan of lamb in any capacity, give this recipe a try — I promise you won’t be disappointed.

            Vietnamese Banh Mi


            from Andrea Nguyen’s, Into the Vietnamese Kitchen 

            INGREDIENTS:
            • 2 8-inch long pieces of a light, airy french baguette
            • Mayonnaise or softened butter
            • Soy Sauce or Maggi Seasoning for drizzling
            • 2-3 cups grilled, sliced, boneless-skinless, five spice chicken thighs
            • 4-6 thin slices English cucumber, seeded
            • Pickled Daikon and Carrots (Recipe Below)
            • 6 cilantro sprigs
            • Jalapeño, thinly sliced
            • Sriracha Chili Sauce (Optional)

            METHOD:
            1. Slice each piece of baguette in half horizontally, stopping before you cut all the way through to leave a hinge.  Lightly toast the baguette pieces in the oven until just barely crusty and set aside to cool for a moment.
            2. Generously slather the inside of each baguette with mayonnaise or softened butter and sprinkle with a few dashes of soy sauce or Maggi seasoning.
            3. Layer in warm slices of grilled five-spice chicken and top with 1/3 cup pickled daikon/carrots, cucumber, cilantro and a few slices of jalapeño.
            4. Serve warm or at room temperature.
            Makes enough for 2 sandwiches

            NOTES:

            When making a sandwich of this caliber, it’s important that all of the ingredients be of the highest quality and freshness that you can find.  Start out by looking for a nice, light and airy french baguette.  The last thing you want here is a chewy, razor sharp crust getting in the way of all those delicious, delicate flavors within.  I’ve gone with 5-spice chicken for this particular build, but feel free to use grilled lemongrass beef, Vietnamese roast pork, Chinese-style char siu, pÃ¥té, or even your favorite deli meat.  One of my favorite components of a good banh mi is the sharp, bright heat of a few jalapeño rings.  If that kinda heat isn’t your thing, consider drizzling in sriracha to give your sandwich a bit of bite.  No matter what you do, definitely take the time to make the pickled daikon and carrots from the recipe listed below.  A banh mi really isn’t a banh mi without them. 
             
            NOTES: from Michael Parlapiano

            If you haven’t tried Vietnamese banh mi by now, you’ve been missing out on a truly remarkable sandwich. At once exotic, but at the same time decidedly familiar, these guys are unlike anything in the American lunchtime lineup.  No cheese or mustard here, just the perfect marriage of sour, salty and savory Vietnamese flavors on a sweet, light-as-air, French baguette all harmoniously coming together in one killer snack.

            Topped with crunchy pickled carrots and daikon, cool sliced cucumber, aromatic cilantro and spicy chilies, a good banh mi is a melange of flavors and textures. Not unlike a BLT, banh mi are salty, crunchy and juicy with a nice counterpoint of warm meats. Packed with savory roast pork or my version with grilled five-spice chicken shown above, the real beauty of this sandwich is its variety of delicious proteins.  From grilled lemongrass beef or sardine, to the deli combo loaded with roast pork, mortadella and paté there are plenty of options out there to satisfy any hankering. Here in San Francisco, Saigon Sandwich on Larkin Street is home to some of the finest banh mi around.  At $3.50 apiece, I defy you to find a better quality, more filling sandwich for cheaper anywhere in the city.  This is the Asian sandwich. 

            Pickled Daikon 


            Be warned, these guys can positively reek.  Don’t let the smell put you off as they have a wonderful sweet, sour quality and add the perfect, necessary crunch to the sandwich. For a full primer on how to pick out daikon and craft the flavor to suit your own taste, check out Andrea’s thorough primer on do chua here.

            INGREDIENTS:
            • 1 large carrot, peeled and cut into thick matchsticks
            • 1 pound daikons, each no larger than 2 inches in diameter, peeled and cut into thick matchsticks
            • 1 teaspoon salt
            • 2 teaspoons plus 1/2 cup sugar
            • 1  1/4 cups distilled white vinegar
            • 1 cup lukewarm water


            METHOD:
            1. Place the carrot and daikons in a bowl and sprinkle with the salt and 2 teaspoons of the sugar. Use your hands to knead the vegetables for about 3 minutes, expelling the water from them. They will soften and liquid will pool at the bottom of the bowl. Stop kneading when you can bend a piece of daikon so that the ends touch but the daikon does not break. The vegetables should have lost about one-fourth of their volume. Drain in a colander and rinse under cold running water, then press gently to expel extra water. Return the vegetables to the bowl if you plan to eat them soon, or transfer them to a 1-quart jar for longer storage.
            2. To make the brine, in a bowl, combine the 1/2 cup sugar, the vinegar, and the water and stir to dissolve the sugar. Pour over the vegetables. The brine should cover the vegetables. Let the vegetables marinate in the brine for at least 1 hour before eating. They will keep in the refrigerator for up to 4 weeks. Beyond that point, they get tired.

              Pizza with Roasted Garlc and Potato


              from Escape from New York Pizza, San Francisco

              INGREDIENTS:
              • 24 ounces homemade or store-bought pizza dough, divided
              • 1/2 cup all-purpose flour, for dusting
              • About 1 cup homemade pesto (or store-bought)
              • 2-3 cups grated mozzarella/provolone cheese
              • 1 cup roasted or confit garlic cloves (recipe below)
              • 4 red skinned potatoes, very thinly sliced
              • 1/2 teaspoon Italian seasoning
              • Olive oil
              • Kosher salt and freshly ground black pepper
              • Crushed red pepper flakes

              METHOD:

              1. Place a pizza stone in the lower third of the oven and preheat to 500°.  Allow the stone to heat for at least half an hour before baking pizzas.
              2. Allow the pizza dough to come to room temperature.  On a lightly-floured work surface, form the dough into two large balls, collecting the sides and tucking them under to create a smooth outer surface.  Cover the dough with a damp towel and allow to rest for at least 20 minutes.
              3. Meanwhile, blanch the potato slices in boiling water until just cooked through, anywhere between 1 – 2 minutes.  Drain and allow to cool slightly before drying the slices with paper towels and coating them with a touch of olive oil, a pinch of Italian seasoning and kosher salt.
              4. Generously dust a wooden peel or the back of a sheet pan with flour or cornmeal. With lightly-floured hands, press the dough with your fingertips to form a flattened disk.  Lift the dough up and use the back of your knuckles to stretch and thin-out the dough into a circle with a diameter of 12-inches. Be careful to preserve the edge of the dough if you want a light, chewy crust. Carefully position the stretched dough onto the prepared peel or baking sheet.
              5. Using a large spoon, spread an even layer of the pesto onto the dough and carefully spread it to within 1/2-inch of the edge, being careful to leave a sauce free edge.  Top with an even layer of the grated mozzarella/provolone cheese followed by slices of parboiled potatoes and roasted garlic cloves.  Top with a light sprinkling of a bit more mozzarella, season with salt to taste and a pinch of red pepper flakes.  Lightly brush the exposed crust with a bit of olive oil (or leftover garlic) oil to promote browning.
              6. Carefully slide the pizza onto the preheated stone and bake until the crust is crisped and golden and the cheese is bubbling and just beginning to brown, about 6-7 minutes.  Remove the pizza from the oven and allow it to rest for a few minutes before slicing.
              Makes enough for 2 pizzas

              NOTES:
               
              As the addition of potatoes are what really sets this pizza apart, it is important to make sure they are cooked and seasoned properly before they go on top of the pie.  To ensure that the potatoes are cooked all the way through when the pizza comes out of the oven, I blanch them in boiling water, just until they lose their crunch.  After draining them off, toss them them with a bit of leftover oil from the roasted garlic, sprinkle with herbs and a bit of salt and they’ll be ready to shine. By the way, making this a second time I added in crumbled bacon I had lying around and it was excellent; I highly recommend it to my pork-loving comrades.

              NOTES:  by Michael Parlapiano

              Mention potatoes on pizza and you’ll get one of two responses. From the folks who’ve tried it, you can expect an enthusiastic thumbs up. From everyone else: a resounding “huh?” That’s the thing about pizza with potato – it sounds strange, until you try it, and then you just get it.

              Tasting the ‘You Say Potato’ slice for the first time at Escape from New York Pizza on Haight Street in San Francisco was this moment for me.  Still in high school at the time, far out pizza toppings went about far as bacon and clams as in my Dad’s favorite New Haven-style pie from Pepe’s in New Haven, Connecticut.  A diehard pepperoni fan, I was blown away by the idea of putting a potato on a pizza.  Actually I probably wouldn’t have tried it had my vegetarian buddy not touted it as being “the best” slice of pizza he’d ever eaten.  He was right. Tender yet toothsome potatoes and savory whole-roasted garlic cloves come together in a one of a kind pesto pizza experience.

              Over a decade later, I finally got around to trying it at home.  Don’t wait as long as I did; add this unbeatable flavor combination to your pizza-making repertoire now.  Then when someone mentions potatoes on a pizza, you’ll know.

              Roasted Tomato Soup

              All content and photography by Michael Parlapiano


              I usually do the cooking in my house, but on a recent trip to the farmers market, my girlfriend stumbled upon a vendor selling what looked to be the last of this season’s tomatoes and was instantly inspired to make this soup. A little overripe, she decided that the still beautiful specimens would taste especially good after roasting in the oven to concentrate their flavor.  Now, I myself am not the biggest tomato soup fan, but I was blown away at how delicious and flavorful the end product became. Somewhere between a tomato bisque and an earthy, slow-cooked tomato sauce, this soup had me sopping up the leftovers from the pot with a piece of toasted sourdough. Perfectly seasoned and especially comforting on a foggy San Francisco evening, my place in the kitchen might be in jeopardy if my girlfriend continues to turn out such satisfying fare.


              ROASTED TOMATO SOUP

              When roasting the tomatoes and bell peppers keep in mind that you want them to both soften and take on a bit of color. Once the tomatoes were in the pot, Lauren used a spatula to scrape in the residual carmelized bits from the sheet pan and added that as well. To make this more refined, just strain it through a fine mesh sieve before serving.

              INGREDIENTS

              • 1 lb. ripe tomatoes, halved or quartered depending on the size
              • 2 large red bell peppers, halved and seeded
              • 1 large onion, chopped
              • 4 cloves garlic, chopped
              • 1 tsp. herbes de provence
              • 1/2 tsp. red pepper flakes
              • 3 to 4 cups chicken stock, vegetable stock or water
              • 2 tbsp. extra virgin olive oil, plus extra for drizzling
              • salt & pepper

              METHOD

              1. Preheat over to 375°.
              2. Coat the tomatoes and bell peppers in a drizzle of olive oil and a hefty pinch of salt and pepper. Roast for 45 minutes to an hour. Remove from the oven and give the bell peppers a rough chop.
              3. Heat 2 tbsp. of olive oil in a small pot. When hot, add the onions and saute over medium heat until golden. Add a pinch of salt, the garlic, the herbes de provence, and the pepper flakes. Stir until fragrant.
              4. Using a spatula lift the soft tomatoes from the sheet and add to the onion mixture. Toss in the bell pepper and cook for a minute or two with the tomatoes and onions.
              5. Pour in the chicken stock. You’ll want just enough to cover the tomatoes and onions. Bring to simmer and cook for 15 minutes.
              6. Once the soup as come together use an immersion blender to blend the soup to your desired consistency. If necessary, feel free to add more chicken stock.
              7. Taste for salt and pepper and allow to simmer 5 more minutes.
              8. Serve with fresh basil and a drizzle of crème fraÎche or sour cream.
              serves 2

              Homemade Sesame Seed Buns

              All content and photography by Michael Parlapiano


              If you’re at all like me, you absolutely loathe the crappy, mass-produced, light-as-air hamburger buns that they have on hand at most major supermarkets.  I’m talking about the ones that you throw your hot, juicy burger onto, that in turn dissolves into a condiment-laden sponge within minutes.  Last Summer, I’d finally had enough and decided to try making some of own.
              While significantly more substantial than those found at most fast food establishments, these little guys are still very tender and delicate, retaining a resiliency that not many sesame seed buns can boast.  Unlike those at the grocery store, these will not melt or crumble in your hands.  They can stand up to a good amount of juices and have a flavor infinitely more complex than your typical factory-made variety.
              With Memorial Day hours away, grilling season is finally upon us. Do yourself a favor this summer and try making these buns from scratch at least once.  I promise, your burgers will thank you.

              HOMEMADE SESAME SEED BUNS

              From Saveur Magazine
              This isn’t the type of thing you make every weekend, so take your time and don’t rush the process.  I like to use a thermometer to measure the temperature of my milk.  It might be a little over-the-top, but properly warmed milk and a bit of sugar will get the yeast activated quickly.  When it comes time to knead the dough, don’t be afraid to do so on medium-high heat.  Let the machine do its job and really work the dough.  For best results, leave your dough to rise in a warm, draft-free spot for the full two hours before moving on to the next step.  For good looking buns, pinch the dough a bit as you roll them into tight balls.  This creates a smooth, uniform skin in the final product.  These buns are by no means just for burgers.  Try them with sloppy joes or even BBQ beef sandwiches.

              INGREDIENTS:

              • 1  1⁄4-ounce package active dry yeast
              • 1 1⁄3 cups milk, heated to 115°
              • 1 1⁄2 teaspoons plus 2 teaspoons sugar
              • 4 cups flour
              • 1 1⁄4 teaspoons kosher salt
              • 1 egg, lightly beaten
              • 4 tablespoons unsalted butter, cut into 1⁄2″ cubes, softened
              • Canola oil, for greasing
              • 3 teaspoons sesame seeds

              METHOD:

              1. In the bowl of a mixer fitted with a paddle, stir together yeast, milk, and 1 1⁄2 tsp. sugar; let foam. Stir in remaining sugar, flour, salt, and egg. Mix on low speed until dough forms. Replace paddle with dough hook; add butter; knead on medium-high speed until dough pulls away from sides of bowl, about 8 minutes. Transfer dough to an oiled bowl; cover with plastic wrap. Let rest in a warm place until doubled in size, about 2 hours.
              2. Heat oven to 400°. Divide dough into 12 portions; shape each into a tight ball. Place balls on a parchment paper–lined baking sheet. Lightly brush balls with oil; cover loosely with plastic wrap. Let rise for 1 1⁄2 hours.
              3. Uncover dough and, using a spray bottle filled with water, moisten dough; sprinkle each ball with 1⁄4 tsp. sesame seeds. Bake, rotating once, until golden brown, 18–20 minutes. Let cool.
              Makes 12 buns

              New Mexico Green Chili with Pork

              All content and photography by Michael Parlapiano


              Having never been to New Mexico, I am by no means an expert on green chili. While I’ve made a Mexican version of chile verde in the past with the addition of tomatillos, this authentic New Mexico version relies exclusively on the smokey, complex flavor of roasted green chiles.
              My sister, having visited the Southwest on several occasions, oftentimes regales me with stories “of the best tasting green chili on the planet” and boasts about the fact that you can get “roasted green chilies on anything.”  Judging by how fanatical the inhabitants of the state are about food in general and especially their famous green sauce, I have no doubt that I would fit right in.
              Knowing how fascinated I am by the humble, yet satisfying cuisine of he Southwest, one of the first cookbooks my girlfriend ever purchased for me was Huntley Dent’s, The Feast of Santa Fe: Cooking of the American Southwest.  While the picadillo recipe has already become one of our all-time favorite weeknight meals, after preparing this authentic green chili, we just might have discovered our new, slow-cooked Sunday sauce.  If the sound or look of this dish doesn’t get you excited, throw some green chilies in the oven to roast and their intoxicating aroma certainly will.
              NEW MEXICO GREEN CHILI WITH PORK
              Adapted from Huntley Dent’s, The Feast of Santa Fe: Cooking of the American Southwest
              When roasting fresh chilies, I prefer to use the stove top gas burner to char off the skin. However, when dealing with this many chilies, the only feasible kitchen solution is to use the broiler.  After roasting, I typically steam the chilies in a bowl covered tightly in plastic wrap.  For this recipe, I suggest placing them into a paper grocery bag.  Once you’re ready to chop the roasted chile flesh, use a food processor to pulse them down to your desired consistency.

              INGREDIENTS

              • 1 lb pork shoulder roast, cut into one-inch cubes
              • 4 tablespoons vegetable oil or olive oil
              • 1 small onion, chopped
              • 2 tablespoons jalapeños, chopped
              • 2 large garlic cloves, chopped
              • 1/4 cup flour
              • 1/2 teaspoon ground cumin
              • 1/2 teaspoon freshly ground black pepper
              • 3 cups chicken or pork broth
              • 2 cups roasted and peeled green chiles, obtained from 18 -20 Anaheim, California or poblano chiles
              • 1/2 teaspoon oregano
              • 1 teaspoon salt

              METHOD

              1. Roast the chilies: Turn your broiler on to high. Begin by placing half of the fresh green chilies on a cookie sheet and placing them under your preheated broiler for 5 minutes, or until the chilies are charred on one side. Remove the pan from the oven and flip chilies to char their underside, about another 5 minutes.  Remove chilies from the oven to a brown paper bag and close tightly to allow the skin to steam away from the flesh. Repeat with the remaining chilies.
              2. Once the all the chiles have cooled, remove them from the paper bag and stem the chilies, removing the charred skin and seeds.
              3. Place the cleaned, roasted chile flesh to a bowl of a food processor and pulse several times until you have reached your desired texture. Set roasted chiles aside.
              4. Brown the Pork: Heat the oil in a large pot over high heat. Lightly season the cubes of pork with salt and add them to the pot, cooking until browned, about 8-10 minutes.  Once browned, remove pork from the pot with a slotted spoon and set aside. Pour off any excess fat, leaving 1/4 cup remaining.
              5. Make the green chili: Add the onions, jalapeños and garlic to the remaining oil in the pot. Cover and cook over low heat for about 5 minutes to sweat the onions. Check halfway to make sure they are not browning.
              6. Raise the heat to medium and stir in the flour, cumin and black pepper, and cook, stirring for 2 minutes to cook the rawness out of the flour and scrape up any browned bits. When the onion and flour mixture just begin to color, remove the pot from the heat and gradually pour in the broth, whisking constantly to prevent any lumps.
              7. Return the pork to the pot along with the roasted chilies, oregano and salt. Place the pot back over moderate heat and bring the mixture to a boil. Lower the heat and simmer for 30 minutes or until the sauce has thickened a bit and the pork is tender. Make sure to stir the sauce occasionally while simmering.
              8. The finished sauce should be thick enough to nap a spoon. If it’s too thick, thin with a bit of extra broth.
              9. Serve with warm flour tortillas.
              serves 8

              BBQ Beef Sandwich with Coleslaw

              All content and photography by Michael Parlapiano


              I spent the weekend barbecuing in the rain.  Sure, Winter might not be the best time to break out the Webber and smoke some meat, but having lived in a San Francisco apartment without access to a yard for a couple of years, I’ll take any opportunity I can get.  I spent the past few days away at my parents vacation home in Sea Ranch, and despite Mother Nature’s best efforts to keep me cooped up inside, I decided to brave the elements and experiment with an old recipe that I’ve been meaning to try for a while now.
              When it comes to barbecue, for me, it doesn’t get much tastier than a good pulled pork sandwich topped with a tangy, vinegary coleslaw.  I’ll order them whenever and wherever.  In fact, on a business trip to North Carolina, I spent nearly $40.00 on a round trip taxi to a local BBQ joint claiming to have the best pulled pork in all of The Carolinas.  However, having spent so much time dedicated to finding the ultimate pulled pork sandwich, it recently donned on me that I’d been neglecting another hallmark barbecue staple — the BBQ Beef Sandwich.
              Now, what you see above is by no means authentic or traditional in any way, shape or form.  This recipe is an adaptation of one from America’s Test Kitchen’s, Cook’s Country for a knock-off, quick riff on the beef-centric barbecue of Texas.  Knowing that I’d be missing the slaw found on its pulled pork cousin, I decided to whip up a batch of creamy coleslaw studded with rich blue cheese – one of beef’s best friends – as a crunchy condiment.  Placed atop some fluffy brioche hamburger buns I found at the local market, I was left with a sandwich that was instantly catapulted into the ranks of some of the best I’ve ever made.  Smoky, saucy and beefy, these sandwiches pack huge flavor.  This recipe is great for a crowd and can be prepared well in advance of service once you have the smoking out of the way.

              BBQ BEEF SANDWICH WITH BLUE CHEESE COLESLAW

              Adapted from Cook’s Country
              This recipe requires the use of a charcoal or gas grill in order to smoke the beef prior to baking it in a low oven to finish cooking and further tenderize the meat.  This step of the cooking process is necessary to develop a nice smoky character and lend the beef an authentic barbecue flavor.  If you are working with a gas grill, simply heat all of the elements on high and place the foil packet full of wood chips on the primary burner.  Allow the foil packet to smoke heavily (about 15 minutes) and keep the primary burner on high while you turn off the remaining burners.  Place the roasting pan on the end of the grill opposite the primary burner, cover the grill and proceed with the recipe as directed below.  For the coleslaw, feel free to add as much or as little of the mayonnaise dressing as you would like.  I personally like to go a little light on the saucing in order to allow the cabbage and carrots to retain some of their crunch.  The slaw can be served cold or at room temperature when it comes time to top the beef sandwiches, but I especially like the cool contrast of a crunchy slaw fresh from the refrigerator against the warm, saucy beef.

              INGREDIENTS:

              For the Beef:
              • 1 boneless beef chuck-eye roast (about 4 – 5 pounds)
              • 1 tablespoon table salt (iodized salt)
              • 1 tablespoon freshly ground black pepper
              • 1 teaspoon cayenne pepper
              • 3 cups wood chips, soaked for 15 minutes
              • 6 soft hamburger buns
              For the Sauce:
              • 1 onion, finely chopped
              • 4 garlic cloves, minced
              • 1/2 teaspoon chili powder
              • 1 1/4 cups ketchup
              • 3/4 cup strong brewed coffee
              • 1/2 cup cider vinegar
              • 1/2 cup packed brown sugar
              • 3 tablespoons Worcestershire sauce
              • 1/2 teaspoon freshly ground black pepper
              For the Coleslaw:
              • 1/2 small head green cabbage, finely shredded
              • 1/2 small head purple cabbage, finely shredded
              • 3 large carrots, peeled and grated
              • 1 cup mayonnaise
              • 2 tablespoons Dijon mustard
              • 1 tablespoon whole grain mustard
              • 1 tablespoon plus 1 teaspoon cider vinegar
              • 1/2 teaspoon celery salt
              • 1/4 teaspoon Kosher salt
              • 1/4 teaspoon freshly ground black pepper
              • 3/4 cup (about 3 ounces) crumbled blue cheese
              • 1/2 cup parsley, coarsely chopped

              METHOD:

              1. Prepare the Beef: In a small bowl, make a rub by combining the salt, pepper and cayenne.  Slice the roast into 4 equal sized pieces and remove any excess fat or gristle.  Rub the meat on all sides with the salt mixture then wrap each piece tightly in plastic wrap.  Place the meat on a plate and allow to sit overnight in the refrigerator.
              2. Smoke the Beef: Unwrap the beef and place them in a single layer in a large disposable aluminum roasting pan.  Neatly wrap the soaked wood chips in a large piece of heavy-duty aluminum foil and poke a few holes in it to allow smoke to escape.  Open the bottom vent of the grill and light 50 coals in a chimney starter.  When the coals are covered in a fine gray ash pour them in a single pile on only one side of the grill.  Place the foil packet directly on top of the hot coals and place the lid on the grill.  Set the cooking grate in place and adjust the vents on the lid of the grill until they are halfway open.  When the wood chips begin to smoke heavily (after about 5 minutes) place the roasting pan on the side of the grill opposite the coals.  Place the lid back on the grill with the vent holes directly over the beef and allow to smoke/roast for about 2 hours, until aromatic and deep red in color.
              3. Braise/Roast the Beef: Preheat the oven to 300° F and adjust rack to the lower-middle position.  Remove the roasting pan from the grill and turn each piece of beef over.  Cover the pan tightly with foil and place in the oven and bake until the meat is fork tender, about 2-3 hours.  Remove the beef from the pan, tent it loosely with foil and allow it to rest for at least 30 minutes.  While the meat is resting, pour off the pan drippings into a gravy separator.  Reserve 2 tablespoons of the separated fat and strain the remaining juices, reserving 1/2 cup of liquid.
              4. Meanwhile, make the Blue Cheese Coleslaw: In a medium bowl, whisk together the mayonnaise, both mustards, vinegar, celery salt, Kosher salt and pepper.  Pour enough of the mayonnaise dressing over the shredded cabbages and grated carrots to moisten them.  Add in the crumbled blue cheese and chopped parsley and toss well to combine.  Cover the bowl and refrigerate for a few hours to allow the flavors to combine.
              5. Make the Barbecue Sauce: Combine the onion and reserved fat in a saucepan over medium heat.  Cook, stirring occasionally until the onion has softened, about 10 minutes.  Add the minced garlic and chili powder and cook, stirring constantly until well combined and aromatic, about 30 seconds.  Stir in remaining sauce ingredients and reserved juices and simmer until thickened, about 15-20 minutes.  Allow the sauce to cool slightly before straining the sauce if you prefer a velvety texture.
              6. Assemble the Sandwiches: Split and lightly toast each hamburger bun.  Using 2 forks, pull the beef apart into shreds, discarding any excess fat or gristle.  In a saucepan set over low heat, toss the beef with enough barbecue sauce to moisten the meat well.  When heated through, place the sauced beef on top of the bottom half of each bun.  Top the beef with some of the blue cheese coleslaw, add the top half of the bun and serve immediately.
              Makes 8 Sandwiches

              Roasted Chicken with a Mustard Crust

              All content and photography by Michael Parlapiano


              I’m sure they wouldn’t like to admit it, but even some of the world’s most accomplished home cooks struggle when attempting to roast the perfect chicken.  The fact is it’s far easier to make a roasted chicken look good than it is to make it taste good. I don’t know how many times I’ve sat down to enjoy what I believed to be a perfectly roasted chicken — the quintessential golden brown bird flecked with black pepper and fragrant herbs — only to cut into the thing and find it bone dry or worse, still raw at the bone. Or, and this is perhaps worst of all, a combination of both, so that you end up hacking it up and destroying the only thing it had going for it: its good looks.
              But this roast chicken? Well, it’s an entirely different beast, or rather, bird.  First, it’s the smell. An intoxicating aroma of garlic will start you salivating. Then you’ll notice the skin. Not only is it golden brown, it’s crisp, like really crisp.  And beneath that exterior you’ll find the juiciest and most tender chicken you’ve ever cut into. But it’s the flavor that will leave you coming back for more. The marinade’s combination of garlic, mustard, soy sauce and herbes de provence create a flavor that is at once familiar and completely unexpected. In addition to the marinade, the cooking method is also unique. Unlike typical whole roasted chicken, this recipe calls for you to butterfly the bird. Not only does this help the meat cook more evenly, but it also allows you to sear the bottom of the chicken before throwing it in the oven and cook it in half the time of a usual whole roasted chicken. Sound perfect? It is. But don’t take my word for it.

              ROASTED CHICKEN WITH A MUSTARD CRUST

              Adapted from Jacques Pepin’s, More Fast Food My Way
              The thought of removing the backbone from the chicken in this recipe can be a bit overwhelming if you’ve never done it before, but rest assured that it is actually quite a simple skill that all home chefs should have in their arsenal.  Make sure to use a sharp knife or a good pair of heavy duty kitchen shears and don’t be afraid to use a little elbow grease to get through those rib bones.  If you are too intimidated by such a task, most butchers will happily do this for you.  Whichever route you choose though, make sure you save the backbone for making rich, homemade chicken stock.  Cutting deep slashes in and around the thigh and shoulder joints of the bird allows for quick, even cooking due to increased heat penetration.  When it comes time to rest the bird after roasting, don’t let all those beautiful caramelized bits go to waste in the skillet.  Pour off any excess fat, return the skillet to the stove over medium heat and deglaze the pan with a splash of white wine, being sure to scrape up any browned bits clinging to the pan.  Pour in a bit of chicken stock (about a cup), bring to a simmer and swirl in a couple of tablespoons of cold butter just before serving and you will be left with an outstanding gravy, perfect for pouring over fluffy mashed potatoes.

              INGREDIENTS:

              • 2 tablespoons minced garlic
              • 2 tablespoons Dijon mustard
              • 2 tablespoons dry white wine
              • 1 tablespoon soy sauce
              • 2 tablespoons olive oil
              • 1 teaspoon hot sauce
              • 1 teaspoons herbs de Provence
              • 1/2 teaspoon salt
              • 1 chicken (3 1/2 – 4 pounds)

              METHOD:

              1. Whisk all of the ingredients (except chicken) together in a small bowl until emulsified into a fragrant, wet marinade.
              2. Using kitchen shears or a sharp knife, cut along each side of the backbone to remove it.  The best way to do this if you don’t have kitchen shears is to sit the chicken on it’s bottom and slice all the way down each side of the back bone in a straight line. Once you’ve removed the backbone, open the chicken up like a book and place it on the cutting board, cavity side down. Press firmly in the center of the breast to crack the breastbone and encourage a flatter shape.  Using a sharp paring knife, cut halfway through both sides of the joints connecting the drumstick to the thigh and cut through the joints of the shoulder under the wing as well.
              3. Place the chicken skin side down in a large baking dish and evenly spoon on half of the mustard marinade.  Flip the chicken over and spread the remaining mustard mixture evenly over the skin side of the chicken.  Wrap the dish in plastic wrap and refrigerate overnight.
              4. Remove the chicken from the refrigerator at least 30 minutes prior to cooking and preheat the oven to 450° F. Place a skillet large enough to accommodate the chicken over high heat.  When hot, place the chicken in the pan skin side up and spoon on any leftover marinade in the baking dish.  Cook the chicken on the stovetop for 5 minutes before placing the entire skillet in the oven.  Roast for 30-35 minutes, or until the chicken is well-browned with a crispy skin.
              5. Remove the skillet from the oven and allow the chicken to rest in the pan for at least 5 minutes.  Place the chicken on a clean cutting board and allow it to rest for another 5 minutes.  Cut the chicken into 8 pieces using a sharp knife or kitchen shears and serve alongside mashed potatoes or a mixed green salad.
              Serves 4

              Sausage and Lentil Stew

              All content and photography by Michael Parlapiano


              Let’s be honest — this dish isn’t going to be winning any beauty pageants anytime soon.  With it’s reddish-brown color scheme and thick, chili-like texture, this isn’t the type of recipe that turns many heads on Foodgawker or Tastespotting.  So, like a friend who’s just set you up on a blind date with an aesthetically challenged individual, I implore you to move past its humble appearance and try to get to know the soul of this comforting dish.
              For me, this is cold weather fare at its best.  A warm, stick-to-your-ribs type meal that’s like a hug from a loved one.  Creamy lentils and sausages combine to produce a dish that is both high in protein and rich in savory flavor.  The best part? It’s cheap and simple to make.  In fact, you probably already have everything to make it your kitchen.  All you really need is a handful of lentils, a few sausages from the fridge, a leftover glass of wine, and you can have a filling and satisfying meal at a moment’s notice.  This is hearty food that reheats well and makes great leftovers.
              If looks don’t matter, you might have found your new soul mate.

              SAUSAGE AND LENTIL STEW


              I like to use French green lentils in this recipe because they hold their shape and retain great texture when cooked for long periods of time.  If you don’t have any on hand, feel free to substitute brown lentils but expect a slightly different finished texture.  If you want a healthier version of this stew, omit the bacon and pour off all of the rendered sausage fat after browning.  If you decide to go down this route, simply substitute a couple of tablespoons of good olive oil before cooking the vegetables.  Feel free to use any herbs or spices you have lying around your kitchen.  I’ve made this with everything from rosemary to curry powder with excellent results, so experiment away. Finally, I’ve found that other sausages work well in this application.  Merguez and goat would also make for a stellar stew.

              INGREDIENTS:

              • 2 slices smoky bacon
              • 4 sweet or hot Italian sausages, cut into 1-inch pieces
              • 1 cup petite French lentils, rinsed and drained
              • 1 cup diced carrot
              • 1 medium onion, diced
              • 5 cloves garlic, finely chopped
              • 1 teaspoon fresh thyme leave
              • Crushed red pepper flakes
              • 2 bay leaves
              • 1 cup dry red wine
              • 1 14-ounce can tomatoes, crushed
              • 2 cups chicken stock
              • 2 roasted red peppers, sliced 1/4-inch thick
              • 4 sprigs of parsley
              • Salt and freshly ground black pepper
              • 1 teaspoon balsamic vinegar
              • Chopped parsley for garnish

              METHOD:

              1. Set a large, heavy-bottomed pot over moderately-low heat and cook bacon until the fat has rendered.  Using a slotted spoon, remove the bacon from the pot and set aside.  Increase the heat to moderately-high and brown the sausage pieces in the reserved bacon fat.  Be careful not to crowd the pot; fry the sausages in separate batches if necessary.  Once they are sufficiently caramelized (about 8 minutes per batch), remove the browned sausage pieces to a plate using a slotted spoon.
              2. Lower the heat to moderate and add in the carrots, onion and garlic. Sauté until softened and just beginning to brown, about 10 minutes.  Add in the crushed red pepper flakes, bay leaves and thyme and sauté another 5 minutes.  Add in the red wine to deglaze and scrape up any browned bits from the bottom of the pot with the back of a wooden spoon.  Allow the wine to reduce by half before adding the lentils, tomatoes, chicken stock, red peppers and parsley.
              3. Add the cooked bacon and sausages back into the pot along with any juices that may have collected.  Stir to mix well and bring to a boil.  Turn down the heat and simmer for an hour, or until the lentils are just al dente.  Stir occasionally to prevent scorching.
              4. Stir in the balsamic vinegar and season the lentil stew with salt and pepper to taste.  Garnish with chopped parsley and serve.
              Serves 4